By TJ Grim, Ready 2 Respond Trainer
Even the best drying equipment can fall short if it’s placed in areas to be dried without a solid strategy. Incorrect placement slows down recovery, drives up energy use, and can allow hidden moisture to linger long enough to cause secondary damage like mold growth.
Facilities teams don’t need to be drying experts to get this right. By learning a few equipment placement fundamentals and avoiding the most common mistakes, teams can shorten drying times, reduce damage, and return spaces to use faster – all while lowering the risk of costly claims.
What Good Placement Looks Like
Effective drying relies on a balance of air circulation, moisture removal, and controlled temperature. Air movers push moisture to the surface of wet materials so it can evaporate, while dehumidifiers pull moisture out of the air. When these two forces work together – and equipment is placed strategically – drying progresses faster.
Common Mistakes in Equipment Placement
Even experienced teams can fall into habits that compromise the drying process. Here are some frequent errors and how to correct them.
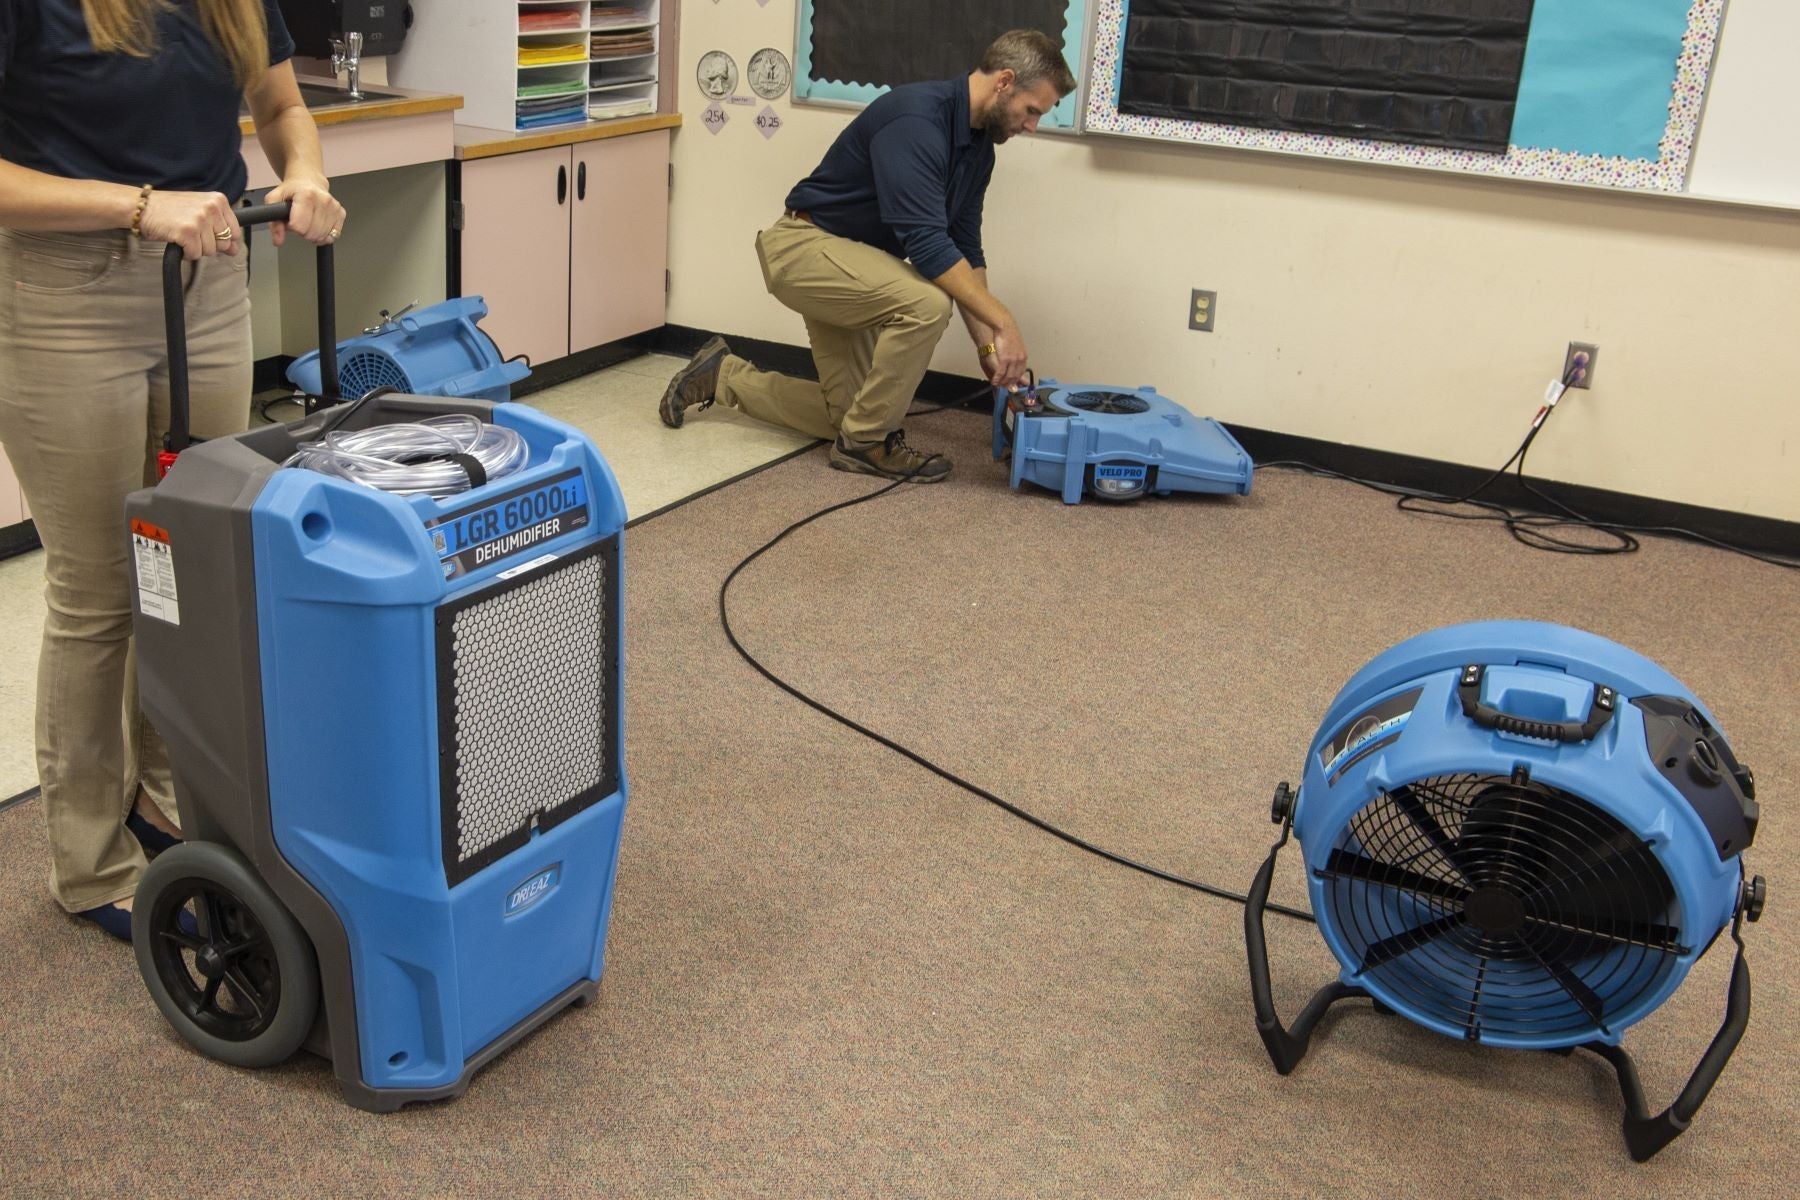
1. Using the Wrong Size – or Too Few – Units
The problem: An undersized dehumidifier in a gymnasium will take forever to do its job, while an oversized unit in a small office wastes energy and may over-dry finishes. Even more common is not deploying enough airmovers to match the size and structure of the area. Participants in Ready 2 Respond® First Responder Training are often surprised by how many airmovers are required to create adequate circulation for efficient drying.
The fix: Start by placing dehumidifiers first, then add airmovers. In larger or segmented spaces, create moisture “capture zones” with dehumidifier and airmover sets for each area to ensure even drying. Also, make sure you’re using professional-grade equipment, not consumer models that weren’t designed for structural drying. In addition, use low-grain refrigerant (LGR) dehumidifiers, which can remove moisture from dense materials more efficiently.
2. Crowding Equipment Together
The problem: Dehumidifiers and airmovers placed too close to each other create “dead zones,” where air doesn’t circulate properly.
The fix: Spread equipment evenly throughout the affected area so air can move freely. Check that airflow paths promote good overall air circulation in the room.
3. Placing Dehumidifiers in Obstructed Areas
The problem: Obstructions limit airflow and prevent dehumidifiers from exchanging enough air to lower humidity.
The fix: Position units centrally, with clear intake and exhaust paths. If a corner placement is unavoidable, leave plenty of clearance on all sides.
4. Aiming Airmovers Only at Visible Wet Spots
The problem: Teams often direct airmovers straight at puddles or damp carpets, leaving moisture trapped in walls, baseboards, or under flooring.
The fix: Angle airmovers at 45 degrees along walls and overlap their airflow patterns to –create an air circulation vortex flowing in the same direction. Don’t assume a dry-looking surface is truly dry – hidden moisture is often the bigger risk. Always use moisture meters to verify what’s dry.
5. Directing Dehumidifier Air at Finished Surfaces
The problem: The warm, dry air from dehumidifiers can cause hard finished surfaces to over-dry and suffer damage.
The fix: Position dehumidifiers so outlet air blows into an open area where nearby airmovers can circulate the drier, processed air through the space.
6. Pointing Airflows Into Each Other
The problem: When an airmover’s stream blows directly into a dehumidifier intake, it changes the rate of airflow across the dehumidifier coils and reduces dehumidification performance.
The fix: Orient equipment so airflow works together, not against itself. Place dehumidifiers near – but not blocking – an airmover’s outlet and avoid directing airflow straight into the dehumidifier intake.
7. Ignoring Vertical Surfaces
The problem: Ceilings and upper walls often stay damp longer, leading to hidden mold or structural damage.
The fix: Place some airmovers pointing upward for vertical drying. Always inspect higher areas when water damage has spread beyond the floor surface or even originated from the level above.
8. Failing to Adjust as Conditions Change
The problem: Teams often set equipment and leave it unattended, even though humidity and temperature shift as drying progresses.
The fix: Monitor regularly with moisture meters, and reposition, remove, or add equipment as conditions change to maintain effective drying.
Practical Placement Tips
Successful equipment placement starts with planning and continues with consistent monitoring. Here are a few practical ways to strengthen response:
- Map the airflow before setup. A quick walk-through helps identify how dehumidifiers and airmovers will work together and prevents wasted effort.
- Document your setup. Photos and notes support insurance claims and create a record that the team can reference during future events.
- Keep adjusting. Reposition or remove equipment as humidity drops and conditions change – “set it and forget it” rarely works.
- Practice placement. Incorporate equipment setup into training to build confidence and ensure faster, more effective response in real emergencies.
The Payoff
Correct equipment placement isn’t just a technical detail – it’s a risk management strategy. Faster drying minimizes disruption, reduces repair costs, and lowers the likelihood of expensive secondary damage. By avoiding the most common placement mistakes, facilities teams can turn water emergencies from major setbacks into manageable events – keeping buildings safer, drier, and more resilient.
Contact the R2R team for assistance with a customized response plan that includes preparedness assessment and equipment training. For facility management tips, follow us on LinkedIn and subscribe to our monthly Facility Insights enewsletter.
Lessons from Healthcare Frontlines: Water Challenges for Facilities
Case Study: Mt. San Antonio College Transforms Water Event Response